Tuesday, January 27, 2009

Brussels Sprouts


Yesterday, I decided to work out. This normally is not something to blog about, but when it has been 25 months since the last work out- this is probably something to tell just about anyone that will listen. I'm proud of myself; I managed to run 1 mile and do a 20 minute Jillian Michaels DVD. After 2 back to back pregnancies, this is pretty impressive. Trust me.

So, you know how after you work out you immediately feel thinner and more fit? Like just 1 run on a treadmill all of a sudden has you ready to audition for Bowflex commercials. I'm still pissed that my husband came home from work and didn't comment on my skinny self. So here I am, my thinner, much more fit self today trying to decide what is for dinner. Fit girls do not eat anything with oil or butter. Fish! Fit girls eat Fish.

So I went and got myself some fish at Whole Foods and along the way passed the produce section. Broccoli? No, had that last night. Carrots? No, too sweet. Potatoes? NO WAY, fit girls cannot eat those carbs! But there they were- the poster child for all healthy food everywhere.

Brussels Sprouts! (Yes, it has an "s" at the end, so many people leave that off!)
I know..groan..moan..Brussels Sprouts? "Is she crazy?"

Ok, so they aren't exactly as blog worthy as Chocolate Chip Cookies and Fried Chicken. But these little guys, when prepared well (isn't that true about everything, though?) are really so tasty.

They looked so cute in the store in their little purple mesh bag - like little baby cabbages (ok, that is what they are) and so round and green.

I think they get a bad rap since most memories we have of them are pretty vile. When boiled they are mushy and bitter. Not to mention, they like typify "green icky food". Kids every where shutter when they think of them and this makes me so sad because its just the cooking method that can make these cute little buggers go from YUCK to YUM...(read below)

Here is the thing- you have got to bring the flavor to these guys because on their own, they don't have much at all. For me, flavor is all about garlic and caramelizing. I've tried roasting them in the past and was not too happy with the results. After some searching online I landed on a recipe that really takes these things to another level.

So tonight my thinner by the minute self (oh and the family too), ate fish, Israeli chopped salad, polenta (hey, a girl needs a couple carbs and polenta seems WAY more healthy than just regular ol potatoes) and these Pan Fried Brussels Sprouts.

And I'm sure, I lost another inch or two, right?

Pan Fried Brussels Sprouts

1 bunch brussels sprouts, trimmed and cut in half
2 garlic cloves thinly sliced
2 tbl olive oil
1 1/2 tbl butter
1/4 cup slivered almonds or pine nuts
Salt and Pepper to taste

In a heavy frying pan (cast iron is best) melt the oil and 1 tbl of the butter on medium heat. Add the garlic slices and saute until golden. Using a slotted spoon, remove the garlic and set aside.

Place the Brussels sprouts, cut side down, into the hot pan, toss nuts around and season with Salt and Pepper. Cook over medium heat until bottoms are browned (about 10-12 minutes). Do not turn.
Remove the Brussels sprouts to dish, add remaining 1/2 tbl butter and garlic to the pan. Once butter melts, pour over the brussels sprouts and serve.


Sunday, January 25, 2009

Fish Tacos


Michael "What are we ordering in for dinner?"
Sam "What? I am making fish tacos?, I told you that"
Michael (while holding crying newborn - insert sarcastic smirk here) "no, you aren't, its 5:30 and you haven't started anything yet"
Sam (while wiping runny nose off toddler who is screaming to hold mommy's keys) "It's quick and that's what we are having, we aren't ordering in!!"

Michael then slinks away with the "oh yeah right" face.

So who hasn't had THOSE nights? those nights when you know the clock is getting ahead of you and your plans for a home cooked meal. 30 minutes later it's pizza delivery time. This is a perfect go to recipe on those nights.....I'll give you all the things to stock in your house so at any given time, you can have a healthy and really really good dinner!

We have a hectic life...I'm sure you do too..its hard juggling all the kids needs while simultaneously getting a healthy dinner on the table. Fish tacos, while they have a nice "wow" factor- are probably already to go in your freezer/fridge and pantry. I always keep on hand Wild Mahi Mahi fillets from Whole Foods. They are flash frozen and at 6.99 a package, a steal. I had some leftover shrimp from last night to throw in too. Then the creativity is up to you. Tonight we did a corn, onion and mushroom saute. (using frozen corn and frozen chopped onion I had stored in there). Shredded cheddar cheese, a lone avocado, some sour cream and a tomato topped it off.

if you are so willing to make one single trip to the store- it should be for some cabbage. The cabbage slaw added a real California twist and gave the tacos a perfect crunch.

Fish Tacos

For fish:
2 medium Mahi Mahi fillets (or any other firm fish)
1 lb frozen shrimp (if desired)
2 tbl vegetable oil
2 tbl chili powder
1 tbl cumin

For veggies: (you can substitute red peppers, peas, carrots - anything you like)
2 cups frozen corn
1 cup fresh mushrooms
1/2 cup chopped onion
1 tbl vegetable oil

For Cabbage Slaw:
1 cup shredded red cabbage
1 cup shredded green cabbage
1 green onion, chopped
1/4 cup yogurt
1 tbl sugar
2 tbl lime juice
salt and pepper to taste

Cabbage Slaw:
In a Large bowl, combine yogurt, green onion, sugar and lime juice. Toss in cabbage and coat. Season with salt and pepper and refrigerate for 15 minutes for flavors to meld.

Fish:
In a small frying pan, saute onion on medium high heat in 1 tbl vegetable oil until translucent. Add corn and mushrooms and saute until browned. Remove from heat and set aside.

Place fish in ziplock bag and combine oil and spices and pour over, shake bag to coat. Remove fish fillets from ziplock and place in a large fry or grill pan set to medium high heat. Cook fish 7-8 minutes until browned. While cooking, lightly break fish apart into smaller flaked pieces. Add in shrimp and saute until shrimp is cooked thru. Remove fish and shrimp from pan and set aside.

Serve with sliced avocado, shredded cheese, chopped tomatoes and sour cream.
We use corn tortillas for the adults and crispy corn tortillas for the kids.


Saturday, January 24, 2009

"Get your 5 a day" Pasta


The butter, the oil, the bread crumbs, the cheese...make it stop! I seem to have been on a major comfort food kick lately and I know, it has to end.

I set out on this blog with such high hopes- I thought Id use this to illustrate just how healthy my kids eat, how lucky I am that they don't complain about what I cook. How we NEVER eat fast food in our house and help others who are challenged to find creative and nutritious foods for their family. blah blah blah.... what fun is that? Who wants to read about whole grain breaded tofu sticks anyway? So it sorta got off track and I'm here to get it back, a bit.

My fellow food buddy, Cynthia told me about a pasta she makes often - an adaptation of an Emeril recipe and it sounded good enough to try. It sounded healthy (spinach and chick peas) while still edible (Parmesan cheese and a bit of heavy cream). I found the recipe online and then proceeded to change it so dramatically that it hardly looked like it was ever related to the original version. I added some shrimp at the end but sauteed chicken or beef would be great too if you wanted to forgo the vegetarian version.


Its not fancy and you can probably substitute just about any veggies you have on hand. I do think the spinach is key though- the more the better. The original version did call for chick peas and I liked the extra protein boost that they gave. Before you hit the little red "x" at the top left and say "Ill check back tomorrow... give it a second look...its chock full of veggies but with just enough creaminess to satisfy.... go ahead, add a few more tablespoons of cheese, its OK:)

"Get your 5 a day" pasta

1 box penne pasta, cooked, drained
2 tbl olive oil
1 bunch spinach, washed well, stems removed
1 cup Yellow Pepper
1 cup sliced zucchini
1 small onion, diced
3 garlic cloves, minced
1 cup sliced mushrooms
1 can chick peas, drained and rinsed
1 cup chicken stock
1/2 cup white wine
1/4 cup heavy cream
1/2 cup cubed mozzarella cheese
1/4 cup Parmesan cheese
1 tbl flour
salt and pepper

In a large pan, saute onion in olive oil until translucent. Add garlic, cook 1 min more. Add yellow pepper, mushrooms and zucchini and saute until lightly browned. De glaze pan with wine and add chicken stock. Add spinach and chick peas and cook until spinach wilts completely. Lightly crush the chick peas with the back of a spoon against the sides of the pan. Season with Salt and Pepper.

Bring to a boil until liquid is reduced by half, reduce to simmer. Add shrimp if using and cover until cooked thru. Remove lid, sprinkle flour over and stir.

Swirl in heavy cream and cheeses, remove from heat and toss with cooked pasta.


Friday, January 23, 2009

The Life Changing Chocolate Chip Cookies


I woke up today with a cold..stuffy head, runny nose and exhaustion. When I get sick I turn to the best remedy I know, food. I had visions in my head of making a fresh chicken soup but my work schedule today got in the way, so I settled for a cup of tea and a little rest when I could sneak it in.

Although chicken soup might have been a better choice, I wanted a soft blanket, the couch and one of these Chocolate Chip Cookies. I discovered this recipe about a month ago, while 9 months pregnant with my son/ I made them so often that I assumed it was a crazy, pregnancy craving that would surely end when he was born. The baby is 7 weeks old, and it's still the dessert I want above all others.

I know, you already have a recipe for Chocolate Chip cookies. They are your Aunt Martha's recipe, its your Nonni's recipe passed down from her mother, its the Toll House or Ghiradelli bag version. Whatever it is, throw it out. Forget you had it. After you make these, there will never be another cookie that comes close. Not even in the same ball park.

This recipe was developed by David Leite and was published in the New York Times last year. He took on the mission to develop the PERFECT chocolate chip cookie. He interviewed everyone and anyone that proclaimed to be an expert on the subject and then developed, what he calls "the consummate chocolate chip cookie'.

con·sum·mate, adjective - complete in every detail : perfect

There are some interesting ingredients required for this recipe that you may not have on hand. Do not substitute, the recipe is truly perfection when left in tact. I like to use a scale when making these to get the proportions exact but you can use regular measuring cups too with no problem. If found the chocolate disks at both Williams Sonoma (E. Guittard) or Whole Foods ( El Ray).


The recipe says to refrigerate the dough for 36 hours before baking. This is next to impossible for two reasons:
1. How do you not eat cookies right after making this dough? I mean, most people bake cookies because they want a cookie NOW not in three days.
2. Cookie Dough, sitting in your fridge for 3 days? Do I have to say more?

But, if you can do it, if you can hold out, you will behold in your hand, the most incredible cookie experience of your life. (Oh, go ahead, bake off a couple before refrigerating them, is OK, I won't tell)


Chocolate Chip Cookies
Published: New York Times July, 2008 - Adapted from Jacques Torres

Time: 45 minutes (for 1 6-cookie batch), plus at least 24 hours’ chilling

2 cups minus 2 tablespoons

(8 1/2 ounces) cake flour

1 2/3 cups (8 1/2 ounces) bread flour

1 1/4 teaspoons baking soda

1 1/2 teaspoons baking powder

1 1/2 teaspoons coarse salt

2 1/2 sticks (1 1/4 cups) unsalted butter

1 1/4 cups (10 ounces) light brown sugar

1 cup plus 2 tablespoons (8 ounces) granulated sugar

2 large eggs

2 teaspoons natural vanilla extract

1 1/4 pounds bittersweet chocolate disks or fèves, at least 60 percent cacao content (see note)

Sea salt.

1. Sift flours, baking soda, baking powder and salt into a bowl. Set aside.

2. Using a mixer fitted with paddle attachment, cream butter and sugars together until very light, about 5 minutes. Add eggs, one at a time, mixing well after each addition. Stir in the vanilla. Reduce speed to low, add dry ingredients and mix until just combined, 5 to 10 seconds. Drop chocolate pieces in and incorporate them without breaking them. Press plastic wrap against dough and refrigerate for 24 to 36 hours. Dough may be used in batches, and can be refrigerated for up to 72 hours.

3. When ready to bake, preheat oven to 350 degrees. Line a baking sheet with parchment paper or a nonstick baking mat. Set aside.

4. Scoop 6 3 1/2-ounce mounds of dough (the size of generous golf balls) onto baking sheet, making sure to turn horizontally any chocolate pieces that are poking up; it will make for a more attractive cookie. Sprinkle lightly with sea salt and bake until golden brown but still soft, 18 to 20 minutes. Transfer sheet to a wire rack for 10 minutes, then slip cookies onto another rack to cool a bit more. Repeat with remaining dough, or reserve dough, refrigerated, for baking remaining batches the next day. Eat warm, with a big napkin.

Yield: 1 1/2 dozen 5-inch cookies.


Monday, January 19, 2009

Fried Chicken

Why are people so afraid of this little chicken? We condemn fried chicken for fear of its artery clogging abilities. We assume that a few bites of this now and then will cut our life short by years..how could something so good be so bad? (That might be a subject for another post entirely)


But you know what, you are all a bunch of hypocrites. Who does not love this food? Find me someone, anyone who does not drool at the smell and sight of really good (crunchy, crispy, moist and juicy) fried chicken. Its roots are soul food and that couldn't be closer to the truth- SOUL food it is...

I make fried chicken wings 2-3x a year. It's usually around football season I get the motivation to stand at my stove for a few hours coating and dipping and frying. Its labor intensive, I won't lie to you but not complicated and the results are just so so worth it. They freeze really well (if there is actually any left) and are amazing either cold or hot.

I consulted all experts on this when searching for the perfect recipe- Paula Dean (if she can't fry a chicken, who can), Ina Garten, Cooks Illustrated, Emeril..but in the end it was Cooks Illustrated's version that won out. They suggest covering your pot while the chicken cooks for about 5 minutes and that will seal in the juices and create the moistest chicken possible. They are right..

So if you are feeling indulgent...if you need some wow factor for a Super Bowl party this year, look no further than this. You will not be sorry.

(Adapted from CI)

Approx 50 Chicken Wings(if more, just add more flour and seasonings) (I like to remove the tips but you can leave them on if you like)
6 cups All Purpose Flour
4 TBL Kosher Salt
1 TBL pepper
1 TBL Paprika
1/2 TBL Garlic Powder
Vegetable Oil
Buttermilk

Soak the Chicken in buttermilk for 6-8 hours
Drain buttermilk and discard
In a large bowl, combine flour, salt, pepper, paprika and garlic powder.
Toss chicken in flour mixture and let sit on a cooking sheet with a rack so the excess flour is removed. Continue with all chicken pieces.
Preheat oven to 250 degrees

Pour Vegetable Oil in to a large dutch oven until it reaches 3" below the top of the pot.
With a fry thermometer, get the oil to 375 degrees (no hotter)
Fry 10-12 wings at a time (do not overlap), cover pot with lid and cook for 5-7 minutes.
Remove lid, toss with slotted spoon and cook an additional 7-9 minutes or until golden brown.
Remove from oil, put the wings on a baking sheet and keep warm in the oven until the remaining wings are finished.

I like to keep them in the oven for an additional 10 minutes to ensure the insides of the chicken are fully cooked. Remove from the oven, sprinkle with a bit more kosher salt and if desired a pinch of cayenne pepper.


Wednesday, January 14, 2009

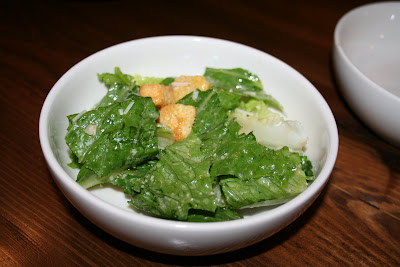
My brush with the Mob- Caesar Salad Recipe


So I'm a Jewish girl from Toronto. What do I know from Italian mobsters? Not much, except for this Caesar Salad recipe.

Here's the story..

My mother was not a cook. She had 2 recipes I remember growing up - Roast Chicken (which is still the recipe I use to this day, handed down to her from her mother) and Caesar Salad dressing from scratch.

Now the Roast Chicken makes sense, we are a Jewish family, my grandmother is pretty "old country" (still serves my grandfather herring on a regular basis kind of thing) and Roast Chicken is a pretty sure bet in a Jewish household. But what was with the Caesar Salad? I didn't ask as a child was just happy to see my mom in the kitchen once in awhile making something..ANYTHING! She just called it "Joey Dogs Caesar Salad" and I guess that satisfied me at the time.

Her dressing was magical. Everyone asked for the recipe that tried it. It was a more complex recipe (or so it seemed when I was 9). Lots of bottles and mixing and whisking.

To this day, even with the knowledge of more sophisticated brands available, I still use Pompeian Red Wine Vinegar, Colemans Dry Mustard and the Kraft green bottle Parmesan cheese, since that is exactly what the original recipe card says to do. I guess I'm afraid to deviate from the recipe...and given the origins of it, my fear may be justified!

But it was, the best ever. It's garlicky and lemony with a hint of anchovies and Parmesan cheese. It takes fresh crisp romaine to a new level. It wasn't until I was much older that I asked her where it came from.

Well, "Joey Dogs" was actually Joe Iannuzzi whom she dated off and on for about 1 year in the early 80's. I recall them going on dates and how he would bring me stupid little toys before they would go out. (in particular, this ridiculous ceramic giraffe) I remember his very "tik" New York accent. Joey Dogs was, it turns out, an FBI Informant for the mob. He was in fact, a mobster himself. While this is crazy to think your nice, Jewish mother was dating a mobster, this thrills the foodie in me, as it makes this recipe far more authentic. It was like I struck recipe gold! An authentic, Italian recipe from a mobster named Joey Dogs who actually gave it first hand to my own mother!

Luckily, my mother and Joey Dogs broke it off, but the recipe remains forever.
"Joey Dogs" Caesar Salad Recipe

1 head fresh crisp Romaine Lettuce, tops trimmed, torn into bite sized pieces
1 cup croutons
3 cloves garlic, crushed and minced
2" long squeeze of Anchovy Paste (or more if you like)
1/4 cup grated Parmesan cheese (yes, you can use the green bottle one here but please use the fresh grated at the end)
1/4 c lemon juice
1 tsp dry mustard
2 tsp worcestershire sauce
1/4 cup Red Wine Vinegar
1 cup good quality Extra Virgin Olive oil
1 egg (optional)
Freshly grated Parmesan cheese

In a large salad bowl combine garlic, anchovy paste, Parmesan cheese, lemon juice, dry mustard and Worcestershire sauce with a whisk until well combined. Add red wine vinegar until mixed in and slowly add olive oil until fully integrated.
In a separate cup, coddle the egg. (Place the egg in a cup and cover with almost boiling water for 2 minutes)
Remove yolk and mix into dressing until emulsified.

Leave the dressing in the bottom of the bowl, add lettuce on top and do not mix. Add 1/4c freshly grated Parmesan cheese and the croutons and toss when just about to serve. This keeps the lettuce from getting soggy.


Tuesday, January 13, 2009

Mac N Cheese- Grown Up!


It's raining out. The temperature is dropping and in Florida when the temperature goes below 67 degrees it finally feels like Winter. So that means comfort food. There is no more quintessential comfort food on the planet than Macaroni & Cheese. It's rich, buttery, cheesy (duh!) and leaves that wonderful fullness in your mouth and tummy. I have lots of "sneaky" recipes for Mac N Cheese..cauliflower puree, butternut squash puree... Sure, they would all be fine, but I wanted the real deal tonight. In all its true fat gram goodness.

So, I decided to go with Gourmet Magazine's Mac N Cheese recipe from a few years back. I cut it out a long time ago and never got around to trying it. What really appealed to me about this one was the crust. So many Mac N Cheese recipes use the cheese to create a dark, browned crust but this recipe took it one step further- it used breadcrumbs, Panko breadcrumbs to be exact, combined with cheese (and more butter) to make a super crisp topping.


I LOVE Panko.We use it exclusively at home. Ian's makes a whole wheat variety that is excellent on fish and chicken, but again, as I said before I was looking to minimize health benefits so I went with the "original style" white. I figured after 1 1/2 sticks of butter and who knows how much cheese in total, using WW bread crumbs was sorta pointless.

Everyone really enjoyed this dish (shocker, I know!) but what I think really made it cute and fun was that I portioned some of it into little ramekins for the kids and they had their own little personal mac n cheeses. I made a few changes to the original recipe as I think it needed a tiny bit more punch then what the recipe called for. I would add some dry mustard and a pinch of cayenne pepper to it before baking (as you will see below)

So..bundle up under the covers, snuggle with your family and pull out your own little ramekin of Mac N Cheese. Tomorrow you can hit the treadmill.


Adapted from Gourmet Magazine
20 servings

Mac N Cheese with Panko Topping

for topping
  • 1/2 stick unsalted butter
  • 2 cups panko (coarse Japanese bread crumbs)
  • 1/4 pound coarsely grated extra-sharp Cheddar (1 1/2 cups)
  • 1/2 cup grated Parmigiano-Reggiano
For macaroni and sauce
  • 1 stick unsalted butter
  • 6 tablespoons all-purpose flour
  • 5 cups whole milk ( I used half 1% and half Whole Milk)
  • 1 pound coarsely grated extra-sharp Cheddar (6 cups)
  • 1/2 cup grated Parmigiano-Reggiano
  • 1 pound elbow macaroni
  • pinch of cayenne
  • 1 tsp dry mustard
  • salt and pepper

Make topping:
Preheat oven to 400°F with rack in middle.

Melt butter, then stir together with panko and topping cheeses in a bowl until combined well.

Make sauce:
Melt butter in a heavy medium saucepan over medium-low heat and stir in flour. Cook roux, stirring, 3 minutes, then whisk in milk. Bring sauce to a boil, whisking constantly, then simmer, whisking occasionally, 3 minutes. Stir in cheeses, 2 teaspoons salt, 1/2 teaspoon pepper, cayenne and dry mustard until smooth. Remove from heat.

Make Macaroni:
Cook macaroni in a pasta pot of boiling salted water (2 tablespoons salt for 4 quarts water) until al dente. Reserve 1 cup cooking water and drain macaroni in a colander. Stir together macaroni, reserved cooking water, and sauce in a large bowl. Transfer to 2 buttered 2-quart shallow baking dishes.

Sprinkle topping evenly over macaroni and bake until golden and bubbling, 20 to 25 minutes.

*You can also do 8 small ramekins and 1-2QT dish for the adults with this recipe*


Monday, January 12, 2009

The veggies are in there, can you find them? It's Taco Night!


My kids LOVE and I mean LOVE taco night.


Its one of the few meals that I know gets the kind of accolades all moms dream about when serving dinner!
"Awesome, Mom!"
"I LOVE tacos!" yes!!"

So the taco is also a slam dunk meal for me since I can sneak a mini cooper in there and I don't think they would notice. It's a pretty standard recipe with my own "sneaky chef" modifications.
Speaking of sneaky chef, that poor woman, Missy Chase Lapine, author of The Sneaky Chef ,
was run over the coals last year when Jerry Seinfeld's wife, Jessica, basically wrote the same book but with the "Seinfeld" name (read: sold many more millions of copies). It's a shame too, because the Sneaky Chef, in my opinion, is far better book. It's not as cute to read, granted, but the recipes are way better. (I already posted about the breakfast cookies on here).

It's not rocket science to sneak veggies into kids' foods but I think for the most part I have just forgotten to do it. I think a lot of moms I know are smart enough to do it, just didn't really think about it until those books came out. So now it's a little game for me- what can I sneak in and where can I sneak it.

So back to tacos..what used to be ground beef and seasonings is now, ground turkey and beef, pureed carrots and spinach, black beans and seasonings. And, like I said before, no one, including the picky husband, has any clue.

Sneaky Sam Tacos
Adapted from about 1,000,000 taco recipes online

2 tbl vegetable oil
1.5 lbs Ground Meat ( use half dark turkey and half lean ground beef)
1/4c onion, minced (about 1/2 medium onion)
3 garlic cloves, minced
1 can smooth style tomato sauce
1/2c Chicken Stock
1/2 can Black Beans
1/2 cup pureed veggies (I used 1/2 carrots and spinach), optional
3 heaping TBL Chili Powder
1 tbl cumin
1 tsp salt
1/2 tsp pepper


Saute' onions and garlic in vegetable oil on medium heat until translucent. Add beef and cook until no longer pink. Drain off fat if necessary.

Add chili powder, cumin, salt, pepper and pureed veggies (if using). Stir to combine. Add tomato sauce and cook on medium high heat for 3 minutes or until well combined. Add chicken stock and simmer until reduced. Add black beans and stir until heated through.

Serve with fresh avocado slices, lettuce, tomatoes, cheese or your favorite taco toppings!


Sunday, January 11, 2009

Breakfast part deux..


I read recently that people who eat two eggs for breakfast lose more weight than people who do not so I took that to mean as long as you INCLUDED 2 eggs into your breakfast you could still lose the weight. Makes sense, right?

So since I am a fan of all things Barefoot Contessa (ok, not the best authority on weight loss, I know) I opened her newest cookbook "Back to Basics" and landed upon the Country French Omelet. Sounded good to me- eggs (bonus! Size 4 here I come!) and the waist whittling ingredients- bacon and potatoes. Perfect! Besides Ina said she and Jeffery eat this everytime they go to Paris and all those french women are so thin!

This was a definite favorite with the whole family.
It's not the prettiest of recipes..but damn its hearty and salty and satisifying. You could substitute Turkey Bacon to save on calories, but why?

The only edit I made on this was to slightly boil the potatoes first. I found that simply frying them just didnt get the insides as soft as I would like.

Adapted from Ina Garten "Back to Basics"

1 tablespoon good olive oil
3 slices thick-cut bacon, cut into 1-inch pieces
1 cup unpeeled Yukon Gold potatoes, 1-inch diced
Kosher salt and freshly ground black pepper
5 extra-large eggs
3 tablespoons milk
1 tablespoon unsalted butter
1 tablespoon fresh chopped chives

Preheat the oven 350 degrees.

In a small saucepan, boil potatoes - 3 mins until just slightly tender, remove from water and set aside.

Heat the olive oil in a 10-inch ovenproof omelet pan over medium heat. Add the bacon and cook for 3 to 5 minutes over medium-low heat, stirring occasionally until the bacon is browned but not crispy. Take the bacon out of the pan with a slotted spoon and set aside on a plate.

Place the potatoes in the pan and sprinkle with salt and pepper. Cook over medium-low heat for 8 to 10 minutes, until very tender and browned, tossing occasionally to brown evenly. Remove with a slotted spoon to the same plate with the bacon.

Meanwhile, in a medium bowl, beat the eggs, milk, 1/2 teaspoon salt and 1/4 teaspoon pepper together with a fork. After the potatoes are removed, pour the fat out of the pan and discard. Add the butter, lower the heat to low, and pour the eggs into the hot pan. Sprinkle the bacon, potatoes and chives evenly over the top and place the pan in the oven for about 8 minutes, just until the eggs are set. Slide onto a plate, divide in half and serve hot.


Saturday, January 10, 2009

I hate breakfast


I do. Its just about getting thru it. I try to be healthy about it I really do..I make oatmeal but more often than not it sits on the stove congealing into a lump of mush until it slides down the garbage disposal...

I make eggs and sometimes eat them imaging its some superfood that will keep me from being hungry until lunch(who said this? I have never once in my life NOT been hungry before lunchtime?)....I optimistically put low fat cottage cheese mixed with berries in the bowl and get bored after a few bites.

What do I want? Well a cookie would be nice.. Why can't I have a cookie in the morning? Well for one, my kids would start in with the harmony of "no fair, why do you get one", "mom! I want an oreo too!" "HEY! Mom, why do you get to eat a Mallomar for breakfast?" OK, so cookies are out.

Until now! We have discovered the Breakfast Cookie! Its the answer to all my breakfast prayers...
They are so soft and pillowy with just enough sweetness to satisfy. Kids love em, mommy loves em and Daddy eats 7 on his way out the door.

SNEAKY CHEF’S BREAKFAST COOKIES

Nutrition Highlights: whole grains, calcium, and protein. Rich in vitamins B and E, iron, potassium, folic acid, calcium, tryptophan protein, and fiber.

2 cups whole grain cereal flakes (such as Wheaties or Total)
3/4 cup Flour Blend (1/4 cup white flour, 1/4 cup whole wheat flour, and 1/4 cup wheat germ)
1/2 teaspoon baking soda
1/2 teaspoon salt
1 teaspoon cinnamon
1 large egg
1/2 cup brown sugar
1/4 cup canola oil
2 teaspoons pure vanilla extract
3/4 cup low-fat ricotta cheese
Cinnamon sugar for dusting*
  1. Preheat oven to 400 degrees and line baking sheet with parchment paper (or spray with oil).
  2. Using a rolling pin, gently crush the cereal (in a sealed plastic bag) into coarsely crushed flakes. Alternatively, you can quickly pulse the cereal in a food processor.
  3. In a large mixing bowl, whisk together Flour Blend, crushed cereal, baking soda, salt and cinnamon. In another bowl, whisk together egg, sugar, oil, vanilla, and ricotta cheese. Add the dry ingredients to the wet and mix just enough to moisten dry ingredients. Drop single tablespoonfuls onto the baking sheets, leaving about an inch between cookies. Flatten cookies with the back of a fork and then sprinkle tops generously with cinnamon sugar (or just sugar if your kids don’t like the cinnamon flavor). Bake about 18 to 20 minutes, or until nicely browned and crispy around the edges.

Makes 16 to 18 large cookies.

© Missy Chase Lapine, all rights reserved.


Friday, January 9, 2009

I should have moved to the Hamptons and made friends with Ina Garten...

First of all, thank you to my lifelong friend and equally recipe obsessed friend, Cynthia. You created the A-HA moment that this blog needed to begin.

So where to begin? I am Sam. I am I suppose what is known as a "foodie". I find myself researching recipes at all times of the day. I have a file on my computer entitled "Recipes to Try" and there is at last count 192 recipes in that file. 192 recipes? I read food blogs, food articles, watch food network and read and re-read my cookbooks more often than I would care to admit. I know more about the stars on Food Network than I do my own family. Ina, Giada, Bobby, Tyler...we are on a first name basis...at least in this house. My 16 month old actually ENJOYS Paula Dean's program..seriously.

And I have 4 kids. And run 2 businesses. And sleep occasionally. So I am parlaying my ridiculous cooking obsession to something good. I will, starting tomorrow, actually tackle those recipes I read about daily and post about them here. I will try my hardest to blog mostly about feeding picky children (As a mom myself I say all too often the name of this blog at each dinner "just 3 bites, please, mommy works hard you know everyday to make you a healthy dinner. Just eat 3 bites and Ill be happy") and the recipes that work (or don't)..but occasionally Ill deviate to blog about my grown up meals as well.

Who knows? Perhaps Ill have a following of 3 (Cynthia because she made me do it, my cousin Marnie because she loves me and will want to edit for grammar and my husband who might want to know what is for dinner) or perhaps a following of 3000....

Good night..sweet dreams..Ill be back tomorrow with recipe #1.

Sam